MySQL and an Admin Tool (e.g., phpMyAdmin) needs to be installed on a server. See also the tips for installation (German)
Please contact your IT service to clarify how to operate the database safely.
The provided MySQL/Maria database needs to be imported into the installed MySQL and the provided *.zip archive needs to be copied and unzipped in the respective host folder.
Navigation - General functions
As a user, you can also use the navigation buttons from your browser. There might be the request to 'resubmit the form', which you need to accept.
As an admin, that would not be recommended as resubmitting a form might lead to an error.
Cancel / Back
On top of each page a navigation button to previous page can be found:
Back
It cancels all changes done on that respective page.
Edit a row
In some of the views, the content is editable. You can find a blue underlined text in the column 'Edit':
Edit
After clicking on the link, a new view will open, where the details can be changed.
After changing, the button
needs to be pressed to save the changes in the database.
Upload / Download Files
In some of the views, files can be uploaded. You can find a blue underlined text in the column 'Upload / Download':
Upload
An uploaded file will get a revision number as extension of the filename.
If a file is already uploaded with the same name, it will get new revision number as extension of the filename.
In some of the views, files can be downloaded. You can find a blue underlined text in the column 'Upload / Download':
Download
A menu will pop up, where the file to download can be selected. The file will be downloaded to the download folder on your computer, which is same as the standard folder used by your browser.
Insert a row
In some of the views (e.g. when a list of projects is displayed), a row can be added to a table (e.g. to add a new project). You can find a button most probably at the bottom of a table, which needs to be pressed to insert a row in the database.
Main Navigation Menu at the bottom of each webpage
At the bottom of each page a navigation menu be found:
Startpage will you guide every time back to the main page.
Logout will delete the temporary Session File. It is not required to log out, as the temporary Session File will be also automatically deleted, when closing the webbrowser.
Contact is an optional page
Impressum is a legal requirement in Germany, when the webside is used in the www. It is not required when you use it in your internal network or via VPN.
Login
The database is accessed via WebBrowser, the interface is displayed below:
At the bottom of each page a navigation menu be found:
Startpage will you guide every time back to the main page.
Logout will delete the temporary Session File, which will be also automatically deleted, when closing the webbrowser.
Contact is an optional page
Impressum is a legal requirement in Germany, when the webside is used in the www. It is not required when you use it in your internal network or via VPN.
User profiles
There are three different kind of user profiles defined:
Admin
User
Manager
Different views will be displayed according the assigned profile.
Profile 'Admin'
The admin can
create, update or delete a user.
After login, the main menu is shown with the options for the respective profile.
Main menu option 'Create, update or disable user'
After pressing the button 'View', a table is shown with all user.
To reset the Password, press 'Reset'. The password is than reset to the standard password.
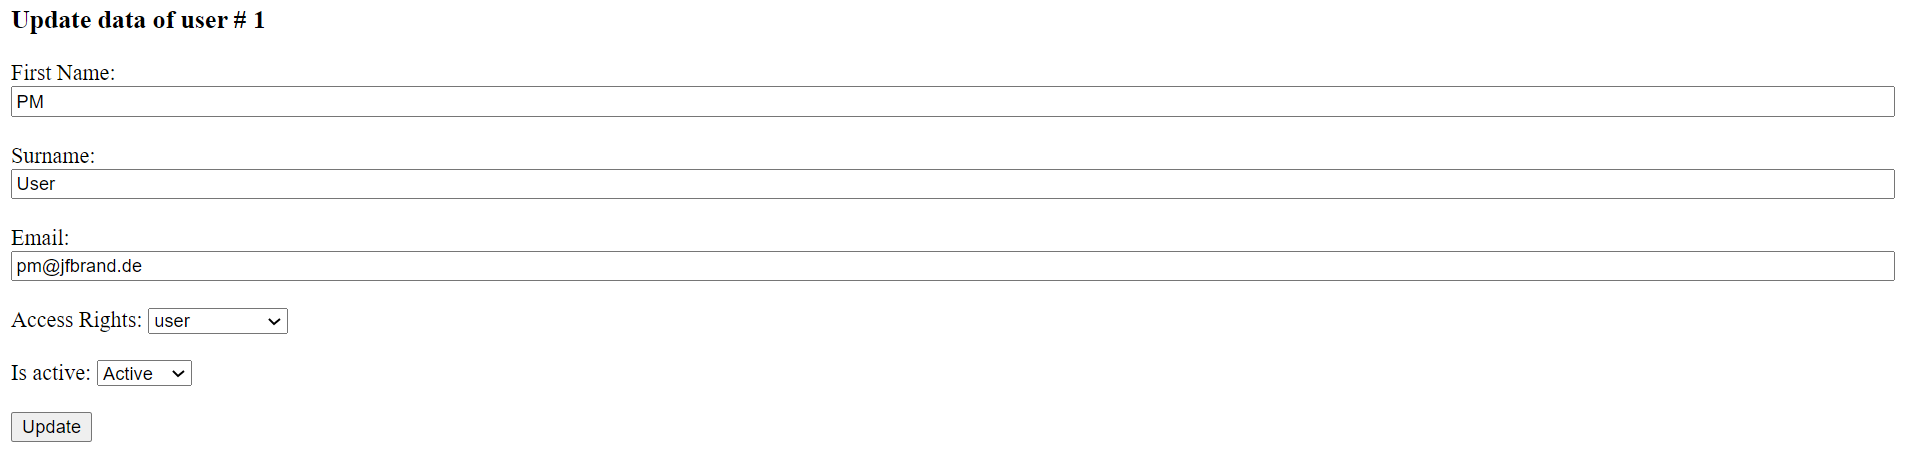
After pressing the button 'Edit', the respective user can be updated.
Main menu option 'Update the content of templates'
The admin can
update the questions in the Quiz's including upload of pictures
insert a new Quiz
assign a Quiz to a User (who will be automatically informed via Email)
The respective menu is shown below:
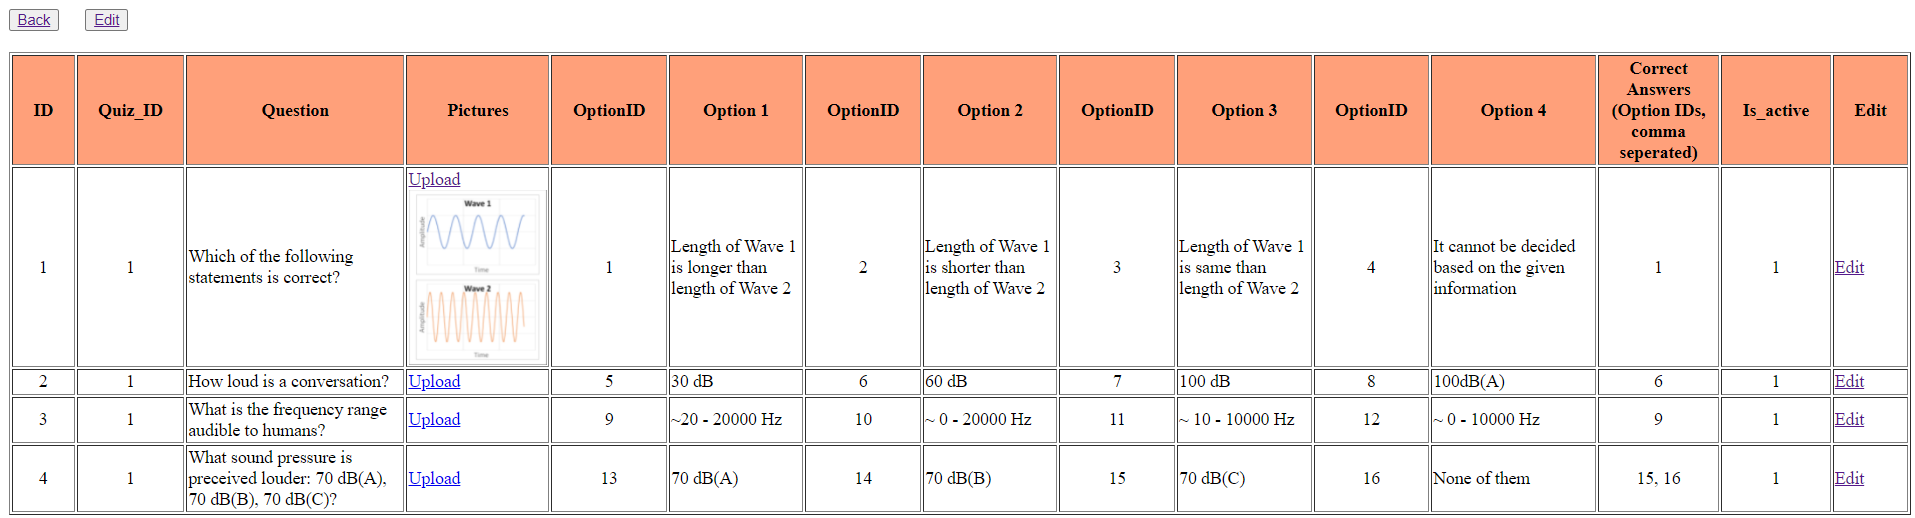
The 'Questions / Quiz to update' gives an overview of all questions:
Here also the upload of pictures can be done.
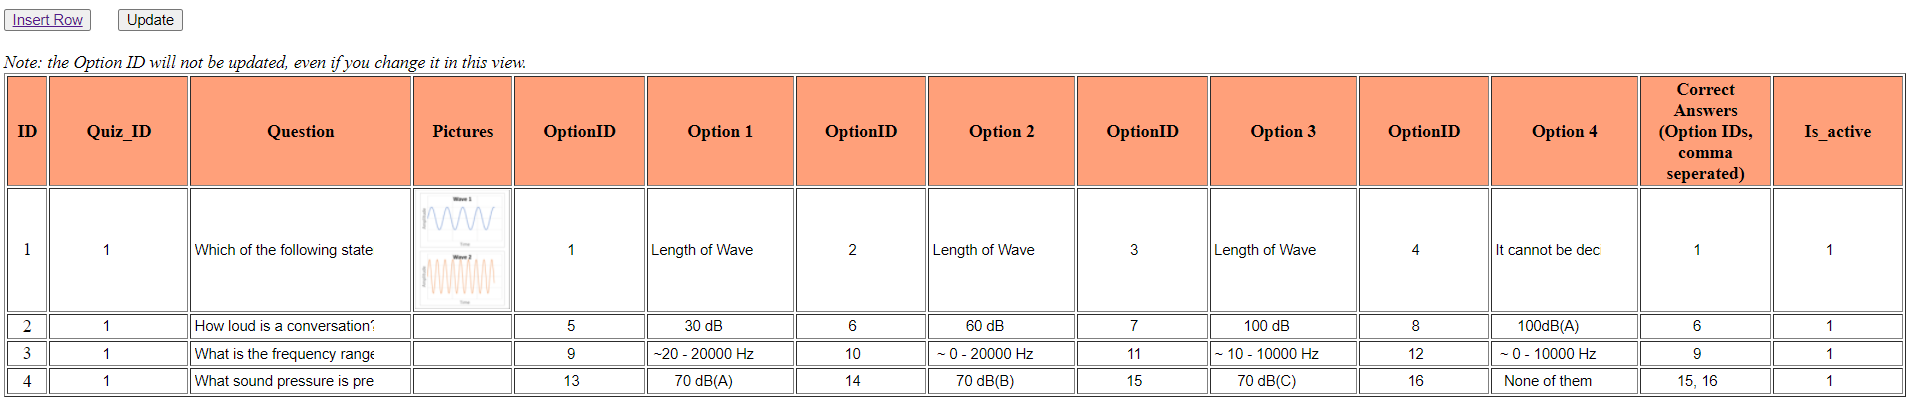
The update of the questions in the Quiz's will be done either line by line by pressing 'Edit' on the left side or all in once by pressing 'Edit' on the top.
An 'Insert new Quiz' will be done by giving a title/desription and a duration of the test.
And the final menu is to 'Assign Quiz to User'.
The user will automatically receive an email with a link to the database, his username and a password.
Profile 'User'
The user can
select assigne tests and start them
The respective menus are shown below:
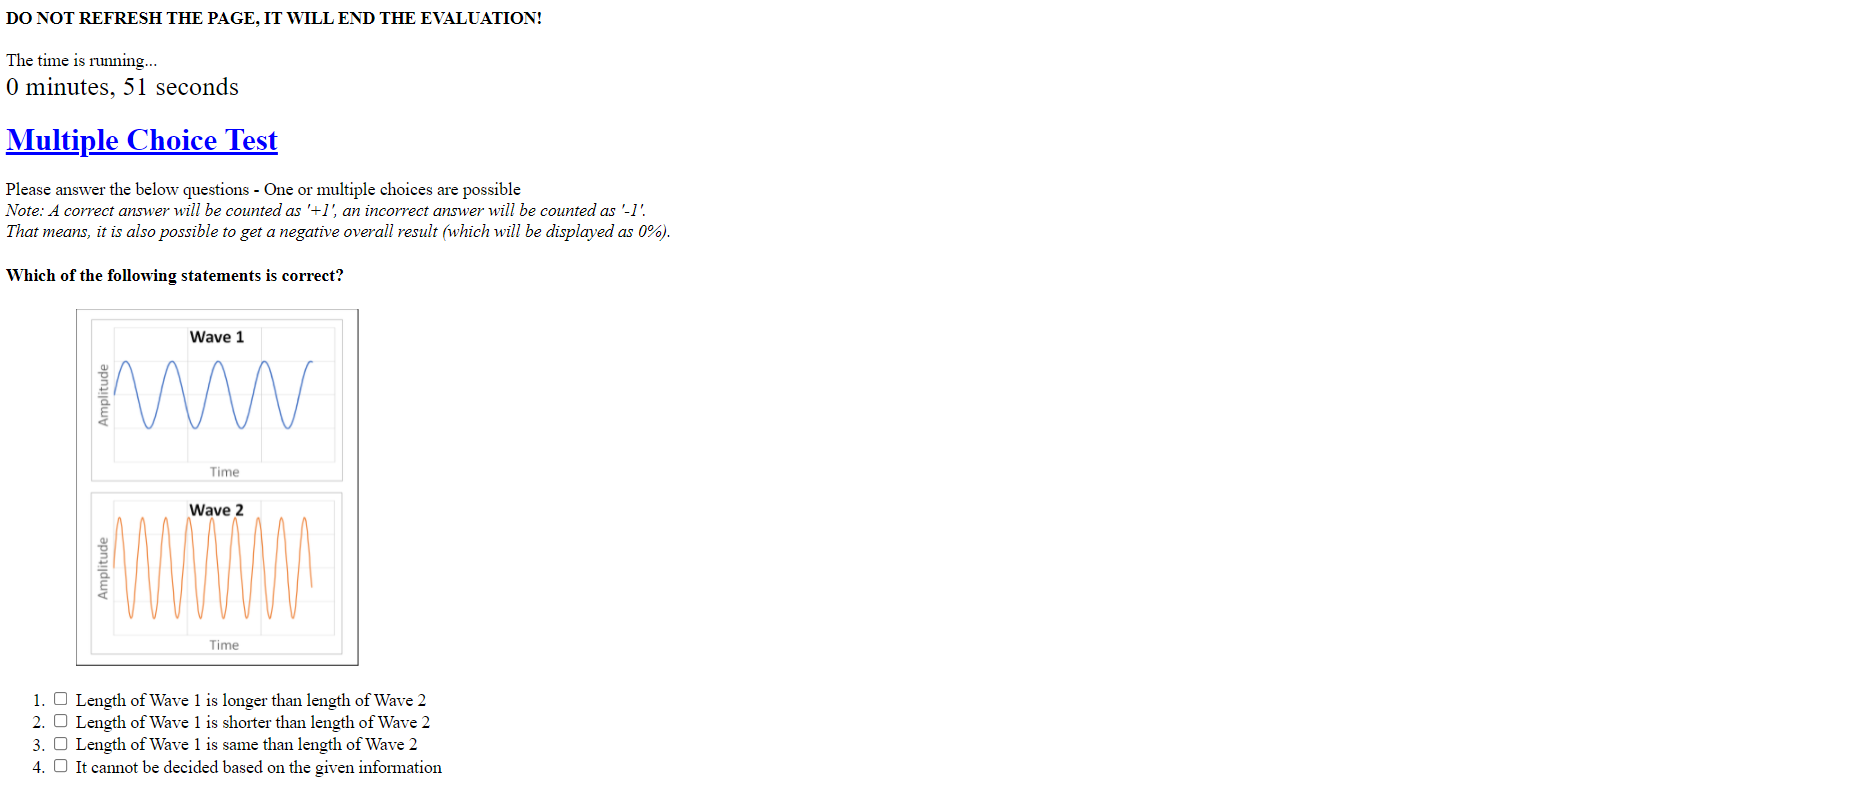
When selecting a 'Quiz to take' and pressing 'Submit', the following view will open and the test starts:
After the time duration is passed or the 'Submit' button is pressed, the score will be shown and stored in the database.
If the user refreshed accidentally the webpage, the Quiz will be disabled.
The Admin can reset the test in the database table 'user_assessment' by deleting the entry in 'DateOfAssessment'.
Notice: As there are instruction given not to refresh the screen, it might be also an attempt to redo the test. Therefore it needs to be well justified.